Saturday, 29 November 2014

Scrap Around the World November 2014 Challenge and Scrap It Girl Challenge

If you're a follower of my Instagram, you'll notice that the picture I uploaded was far from this theme, that's because I forgot about this challenge. Before I went overseas, I decided that I was going to enter this challenge and I totally forgot about it after I come back! I kept seeing their Facebook posts and the deadline is soon, so I decided to post about this challenge first. 

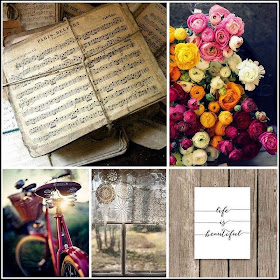
This is the mood board set by Scrap Around the World for this month's challenge. I've also decided to combine with Scrap It Girl's Monthly Challenge as their criteria was to use paints, gelatos and water colors. 


The mood board is pretty inspiring for me as really like the colour combination. It is very cheerful in a rustic/country way. 

The moment I saw this mood board, I had a generic idea in mind of the structure of my layout. When I look at the top left and bottom right of the mood board, I felt the focal point should be horizontal lines, which was by I decided to make the focal point of my layout in horizontal direction.

I also realised took a similar picture at my hotel's lobby when I was overseas so I decided to use this picture as my focal for the layout. 


I picked out a piece of patterned paper from Teresa Collins and applied clear gesso over the whole piece. I then watered down my white gesso and applied it as so. The plan was to put my picture on the right which was why there are more white on the right.


I went ahead to blend those two Kaisercrafts acrylic paint with water and brushed it on top of the dried gesso. 


I then used my Teresa Collins modelling paste and applied it over the stencil by masking off some parts of the stencil to create a smaller flower on the left since the focal point is on the right. 


And because I'm feeling adventurous, I went ahead to layer another damask stencil on top the flower and applied modelling paste which I mixed with Kaisercraft's Wisteria acrylic paint, not forgetting the structure of the layout in mind.


I also dug out my Metallic Gelatos (Pink and Purple) and coloured it on top of the dried embossing paste, adding some yellow here and there. 


Here's a closeup of the background. I also sponge in some gesso as highlight. And I LOVE LOVE LOVE the shine that the Metallic Gelatos created.


And after this, I stopped. The background piece was left on my desk for days because 1) I was busy and 2) I had absolutely no idea what I want to put on top of this piece. 

So a few days later, I came back to start tearing papers from Prima Cartographer Collection and also some Maggie Holmes paper which I absolutely adore (I bought freaking load of it :)) I layered everything up like so along with some gold mesh ribbons and some cheese cloth. 


I also cut up some strips of cotton gauze and distress it with Vintage Photo Distress Ink from Tim Holtz, and layered it along with those papers.


After that, I start building up on flowers and embellishments. I altered some of the flowers with gelato and gesso to highlight it. I also added more yellow/orange stuff to bring out the sunshine part of the mood board. 

Here are some closeups.


This thickers are from Dear Lizzy. I lightly brushed on some gesso and also Pure Sunshine from Dylusions Ink Spray. I also added some burlap strings so that the layout will have some rustic/country feel to it. 


I also brushed on some Art Anthology dimensional medium in Sandstone colour. As you can see, it gives off those sand effect when dried. I think it fitted the rustic/country theme perfectly. I also continued to brush on more Pure Sunshine Dylusions Ink Spray under all my layering to add more 'sunshine' to it. :)


And this is my final layout. Weeee! :)


-----------------------------------------------------------------------

The supplies used are:

Mediums
Finnabair Clear Gesso
Marie's White Gesso
Kaisercrafts Acrylic Paint in Wisteria, Dusty Pink and Hot Pink
Teresa Collins Modeling Paste
Dylusions Ink Spray in Pure Sunshine and Crushed Grape
Art Anthology Dimensional Medium Sandstone
Metallic Gelatos
Distress Ink Pad in Vintage Photo

Embellishments
Burlap Strings
Prima Flowers
Kaisercrafts Paper Blooms
Prima Wood Veneers
Tim Holtz Ideology Film Strip Ribbon
Daiso Metal Label Plate
Dear Lizzy Thickers

----------------------------------------------------------------------

The detail of both challenge is as below:

Scrap Around the World November 2014 Challenge

Please see the mood board at the top of this post.

You only need to be inspired by ONE image but can be inspired by
 more than one or even ALL the images - it really is UP TO YOU!!

We are NOT A COLOUR CHALLENGE SITE so there is no need
to follow our colours, although of course if they are your source of
inspiration you are welcome to use them all, or just some of them,
otherwise none at all!  You have complete artistic freedom BUT
we do need to be able to SEE HOW YOU WERE INSPIRED!
So please remember to tell us in your post!!

To be eligible for judging you need to follow our
 10 Golden Rules HEREwhich include:- 

1)  Sharing the mood board image in your blog post.

2)  Mentioning Scrap Around The World {in full - not just 
SATW} & LINKING BACK to our current challenge.

3)  Explaining how you were inspired by our mood board

4)  Linking back to your SATW blog post NOT YOUR ENTIRE BLOG.

5) We do not accept cards, tags, Off-the-Page items or mini-books.
Only layouts, canvases or art journal pages or spreads
(see our rules for minimum sizes please).


For more information and prizes, CLICK HERE! 

Scrap It Girl Monthly Challenge

Theme: Using Paints, Water Colors or Gelatos. :)

For more information and prizes, CLICK HERE!

----------------------------------------------------------------

Thanks for reading!

Please help to share my blog among your crafty friends! :))


Friday, 21 November 2014

Cheerful Birthday Card Using Avery Elle Stamps

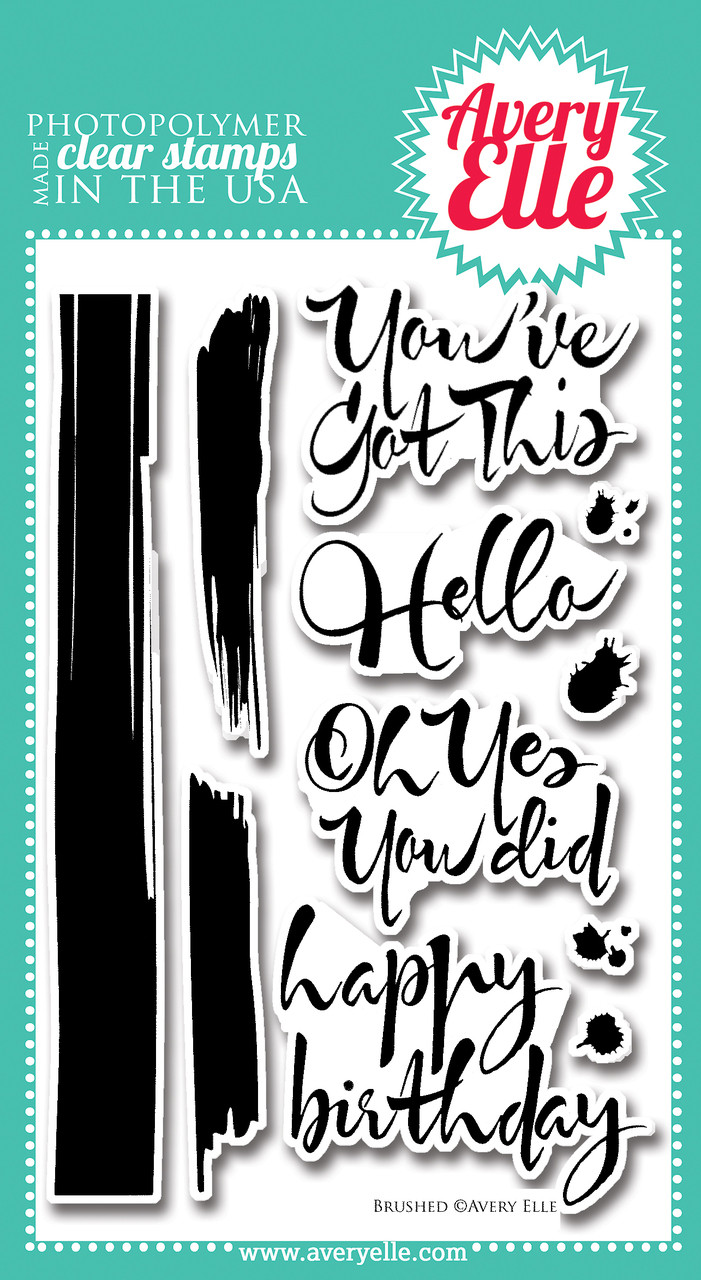
Hi! This is gonna be a simple card made solely using Avery Elle stamps as I was super busy this week and this is really simple but pretty. :)


Avery Elle is definitely one of my favourite stamp brands. They make really good quality clear stamps and I could easily mix and match them to create an entirely different project and still looks good too. 

And as y'all know, I'm a colour addict and I'm addicted to this colour combi currently because they look so cheerful and happy together. They remind me of sunshine. 


So the first step is to create a mask. I used normal unwanted waste paper, stamped the greetings and the fussy cut it out.


I then stuck it down with removable adhesives on my panel and inked up the brush stamp with those 3 colours on alternate.


I then removed the mask and used my heat tool to dry those inks completely as I'm gonna heat emboss the greetings. I do not want the wet inks to retain my embossing powder.


I also used the EK Success powder tool to remove the static to ensure that the embossing powder don't stuck at unwanted areas.


I inked the stamp with versamark ink at the previously masked area and applied embossing powder over it, shook off the excess and heat it up. I also added some splatter with my black dylusion ink and added Ranger's Glossy accent over it.


  A close up look at the black sparkle embossing powder. I usually hate it when the glitters fall over the place, but in this case the glitters are locked down by the embossing powder which makes everything cleaner and tidier.


I then mount the panel on foam tapes on top of a black white card base and added some sequins in matching colours. 

This is the final look!


This is really a very simple and fast card to make. If you're thinking of mass-producing a card, this would definitely be a good choice. With different colour combination, it can be suitable for different genders.


Thanks for reading!


Tuesday, 11 November 2014

#STYDCHALLENGE Layout Challenge between Peers

Welcome back to my blog!

This post will be about the layout challenge that we organised between me and my scrapbooking peers. It's pretty difficult for all of us to meet up hence this change was delayed for months since we couldn't get our group photos. Anyway, we have a criteria that is to use either Pink Paislee's Bella Rouge Collection or Amy Tangerine's Stitched Collection. These two collection are pretty new and we chose them as they are pretty versatile since our styles are different. 

This is the final look of my layout. I also wanna apologise in advance because I did this layout while catching up on a drama, I forgot to take pictures of the process of doing this. :(


So I decided to go for Amy Tangerine's Stitched Collection as I am attracted to this paper.


The first thing I thought were to cut them up and sew them. But apparently, it seems like a lot of people are doing it this way. Anyway since I've already cut it, I choose another piece of paper from the same collection as base, painted it with a coat of clear gesso from Finnabair and layered the pieces like so. I did distressed the edges of the strips with a pair of scissors though it's not very obvious here. 


I layered my paper in a way the focal point goes from left to right. I watered down my gesso and lightly painted it over those stripes since I am going to put paints on it.


I mixed my Kaisercraft acrylic paint (hot pink, spearmint, coastal blue, yellow) with heavy gel so that it gives a slight translucent feel with I paint it over those strips. 


After that I added some stamping in my Memento Black Tux ink with the following stamps, and added a piece of patterned paper (I've forgotten which collection. -.-) as the base for my photo. 


Prima Cigar Box Secret Stamp (for stamping around the borders as well)

Tim Holtz - Stampers Anonymous - Mini Harlequin

Kaisercraft - Texture - Tiny Dot


I forgot to take pictures of how I layered this and how I added colours to the flowers. :(

Anyway, this mess is made up of Kaisercraft's Paper Blooms and Prima Flowers. I watered down my gesso and paint a light coat over the flowers to give it some highlight. I also layered my flowers with some flower die cuts from Crate Paper. 


Prima - Melbourne Collection - Kangaroo

Kaisercraft - Paper Blooms - Coral

Prima - Rodanthe Collection - Esplande

Crate Paper - Open Road Collection - Floral Ephemera
I also added more paints beneath the flowers to give it some contrast with my kaisercraft acrylic paint. 


I create this dripping effect by mixing more water with my acrylic paint and applying the paint to the paper with the paper held upright. 


Added some glass glitter as details.


I chose Heidi Swapp's Ephemera as my sentiment, tucked behind my flower mess.


And this is it!

My after thoughts would be that I am not very happy how the layout turns out as I felt that those flowers are REALLY TOO MESSY!! Plus the alteration of those flowers really gave me much headache. I think I might stay away from flowers for awhile. Haha. 

Anyway, the deadline for our challenge is 25 Nov 2014. You can check out #stydchallenge on Instagram to see my peers layout.

Cheers! :)


Tuesday, 4 November 2014

GIRLS NIGHT OUT

So we went out to celebrate my besties Janabel and Jessica's birthday. And THANK GOD Jessica is a camwhore, which means I get a lot of photos to choose from. It was a great night, food was good, company is awesome (as usual) and the gossip session/ politics discussion session were the best.

Anyway, this is how the final layout looks like.
(All supplies will be listed at the bottom of this post.)


The camera really did not do justice to this layout coz in real life, it really does look SOOOO much better.

Anyway, I first started out putting down a layer of white gesso. I thinned down the gesso slightly by using a wet brush so that the patterned paper is still visible and only applied it to the area that I will be layering paints afterwards.


I pulled out my Kaisercrafts acrylic paints in mint, lime and hot pink colour and applied it to the gesso-ed area. At this point of time I think I regretted choosing this colour scheme as it's pretty ugly and I thought of buying a new piece of this patterned paper coz I really like the design. But then I thought, since I've destroyed it already, I might as well go on and see what I can do with it.


Then I decided to do some stencilling with Teresa Collins' chevron stencil using Dylusion Inks Sprays in Vibrant Turquoise and Bubblegum Pink and stamping in black using film strip stamp set from Kaisercrafts.


 I also did some stencilling in black distress ink using a stencil from Crafter's Workshop. I used my mini-mister and added some perfect pearls pigment powder with water and sprayed it over my layout so that my layout will have some shine. The water will react with the distress ink so by using a paper towel to absorb the rest of the moisture, you can see that the ink becomes fainter.


And following that, I added some modelling paste using another Crafter's Workshop stencil.


Then I diluted my acrylic paint with a wet brush and painted on top of the white embossing paste. So as I was gesso-ing down my cotton gauze that I found in my first aid box, I realised that it leaves interesting texture and print behind. The cotton gauze basically worked as a stencil for these faint highlights. AND I LOVED IT!!!


And to speak truthfully, before I start making layouts, I never had a chance to use mica flakes as on cards. So I grabbed my brand new bottle of mica flakes from Prima Finnabair line (the big scaley looking pieces) and also a bag of confetti flakes I got from spotlight. I applied Rangers Multi Medium Matte on the area I want the flakes to be, sprinkle them and shake off the excess. 

I recommend using matte medium because when it dries, it will not leave gloss behind unlike usual craft glue. This is just a detail but if you do not have matte medium, just go ahead and use craft glue. :)


I then assembled my centre piece using the new Amy Tangerine Stitched Collection's die cuts, layering them on top of the cotton gauze that I gesso-ed. I also chose to print out a picture that is more lomo as I felt that the colours in the background are loud enough.

Here are some close-ups


I used Clear Wink of Stella Glitter Brush by Zig to 'glitter' some of the die cuts because I thought it'll be fun. Haha.

And I suck at choosing sentiments and title of layout.


So my after thought would be that I am not exactly happy with my colour combination? But I thought it looked SOOOO much better that when I first laid my paints down. I guess I wasn't in my right mind to choose this colour but I had fun doing this coz its a challenge for me. Oh! And I won't be buying a new piece of this patterned paper. HAHAHA.

Supplies Used

Gesso and Modeling Paste

Inks for stamping and stenciling

Acrylic Paints and Ink Sprays

Pearly mist

2 types of Mica Flakes

Adhesives

Cotton Gauze

Stencils

Kaiserkraft's Film Edges Textured Stamp

Pink Paislee Bella Rouge Collection

Amy Tangerine Stitched Collection Die Cuts
Kuretake Zig Wink of Stella Clear


That's all for this week! 

THANKS FOR READING! :))