HARLO AGAIN!
This layout is actually a REALLY belated gift to my darling friend whose birthday was long over before I had the time to make this for her. She's super sweet by baking me a birthday cake for my birthday hence I decided to reciprocate by making something I am better at --> Scrapbooking!
This is the final look of the layout.
Firstly, I prepped my white cardstock with a layer of Gesso, mainly at the centre portion as I will be applying mediums there. Then by adding a few drops of Dylusion Ink Spray to my modelling paste from Teresa Collins, I am able to create this dimensional background.
What you need to do is to scoop some modelling paste and mix it with the colour you are using and then swipe it across the stencil at the area you want the colour to be at. The stencil I used was from Teresa Collins as well.
I then dilute the ink with a wet brush and gently watercolour it over the now-dried modelling paste and splatter some ink on top of it after everything dried. (All supplies can be found at the bottom of the post.)
Because I meant to put this in a shadow box, I want my layout to be very dimensional, I forgo my normal dimensional adhesive and go for small pieces of cardboard that I cut out from shipping boxes instead. Those are WAYY higher than normal foam dots and it gives excellent pop-up effect.
I layered my photo with a vellum from Webster's Page's Strawberry Fields Collection and also the chipboard frame from Crate Paper's Notes and Things Collection. I then added some Kaisercraft's Paper Blooms as sorta 'photo corners' cos it feels right. Haha.
If you notice, I cut out the wire that comes with the paper bloom and coiled it around a pen to create the tendril look, I guess it makes the flowers look more interesting.
I also added some chipboard embellishment from Crate Paper Notes and Things Collection's chipboard stickers. In fact, all of the chipboard stickers I used in this layout were from that same sticker set as well. I also die cut a frame from Sizzix using chipboard and altered it to fit the theme/colour scheme and I added some burlap strings that I tore off from a piece of burlap to create some dimension and interesting element to the layout. In fact, burlap is my new best friend!!! HAHAHAHA.
I've also used Dear Lizzy's thickers by American Crafts for my title of the layout. This is a rather old collection, because I think I bought it long long long time ago. I've just managed to dig it out recently. Hehe. But ITS SO PRETTY!!! I LOVE the clear glitter on the thickers and the colour is so sweet. :)
Then as finishing touches, I added some of these clear dew drops all over my page. THIS IS A MUST-HAVE IN YOUR SCRAPBOOK STASH! Because, firstly, it's suitable to use on all themes, be it vintage, or chic girly or masculine, secondly, it's quite cheap for the amount of dew drops you get. I would prefer using this than enamel dots because its rather inexpensive.
You can get them at http://www.shop.robinsnest-scrap.net or at Made With Love Singapore at 313 Somerset if you lived in Singapore.
I've dripped some ink on top of the dew drop to let it flow down to the bottom to create that little circle of colour at the bottom. Make it more interesting. Learn it from a scrapper when I attended her classes. Haha.
And here are the supplies I used
I used Bubblegum Pink, Vibrant Turquoise and Pure Sunshine. Dylusions Ink Sprays were designed by Dyan Reaveley and produced by Ranger.
 |
Teresa Collins' Modeling Paste along with palette knife. Old credit cards will do just fine as well. |
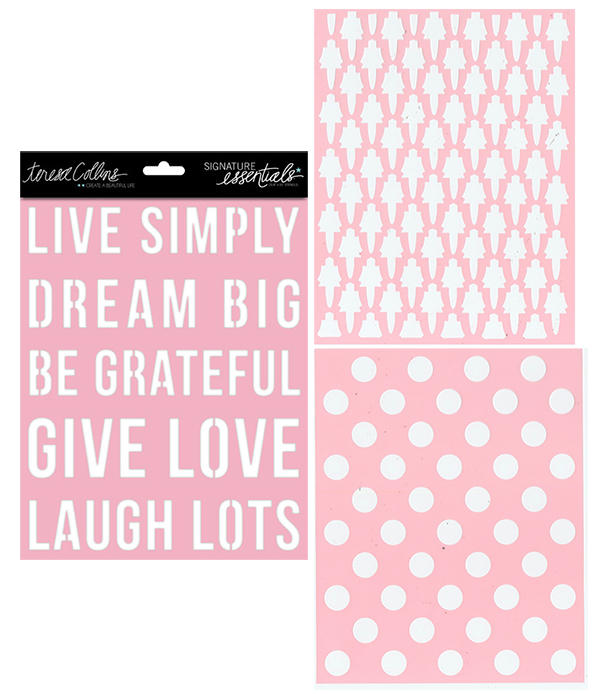
Teresa Collins stencils. Comes in set of three.
Vellum paper from Webster's Page Strawberry Fields Collection
Kaisercraft's Paper Blooms and mini Paper Blooms in assorted colours.
Crate Paper Notes and Things Collection Frames
Crate Paper Notes and Things Chipboard Stickers (ME LOVES!!!)
Dear Lizzy by American Crafts Thickers. Can't figure out which collection cos it's been so long.
Dew Drops by The Robin's Nest. See what I mean by inexpensive?
Thanks for reading! Seeya!


-18492-31.jpg)

No comments:
Post a Comment